The wrong recovery-menu choice can cost you your personal data. Use Wipe cache partition only when your phone’s official instructions support it and that exact option appears; never substitute Wipe data/factory reset.
To wipe the cache partition on a supported Android phone, power it off, enter recovery using the manufacturer’s model-specific instructions, select Wipe cache partition, confirm the cache-only operation, and reboot. This is a separate operation from clearing one app’s cache in Settings. Some phones do not offer a cache-partition wipe, and a missing option is a reason to stop. The steps below explain Samsung’s published button-layout examples, what to check before confirming, and how to decide whether the operation helped.
- Check eligibility first: the phone’s own support instructions and actual recovery menu govern the procedure.
- Read the whole selection: cache wiping and data wiping are different commands.
- Keep a backup: a cache-only command is not intended to erase user data, but selecting a factory reset is destructive.
- Judge the original symptom: a completed wipe does not prove the underlying problem has been fixed.
If your main problem is battery drain, start with the Android battery and performance diagnostic guide to establish what changed before opening recovery.
Is your phone eligible for a cache-partition wipe?
Check the manufacturer’s instructions for your exact phone before trying recovery. Android’s name or version alone does not establish which partitions or menu entries a device has. You need both an applicable official procedure and the cache-only option on the device you are holding.
| What you find | What to do | Why it matters |
|---|---|---|
| Official instructions describe cache wiping and your menu has Wipe cache partition | Follow that procedure, checking each selection | There is a documented route for the operation |
| Instructions require a different recovery-entry procedure | Use the exact model’s guidance | Button layouts and entry conditions differ |
| Recovery has no Wipe cache partition entry | Exit through the reboot option; use another diagnostic route | A different wipe command is not a substitute |
| Only one app is misbehaving | Start with that app’s cache in Settings | This targets the affected app without using recovery |
| The menu or confirmation wording is unfamiliar | Stop and check official support | Do not guess at the scope of a destructive command |
The AOSP explanation of A/B updates says the cache partition is no longer used to store update packages in that architecture. That explains why an old cache-wipe tutorial is not a universal instruction for today’s phones. It does not establish the full recovery menu of every manufacturer or model.
For the background to this change, see how Nougat introduced seamless updates. For this task, the practical question remains whether your phone actually provides the cache-only command.
Takeaway: Confirm support and menu availability before following any button sequence.
What does each kind of clearing actually remove?
A cache-partition wipe, an app-cache clear, an app-data clear and a factory reset target different things. The AOSP recovery implementation describes its cache-wipe command as excluding user data. That distinction is useful, but it does not make every recovery-menu selection safe.
| Operation | Where you encounter it | Scope described by the official source | Decision |
|---|---|---|---|
| Wipe cache partition | Recovery, when supported | AOSP separates cache wiping from user-data wiping | Use only the model’s documented cache-only route |
| Clear cache | An app’s storage settings | Google describes removal of temporary app data | A targeted option for an app problem |
| Clear storage / Clear data | An app’s storage settings | Google describes permanent deletion of app data | Read the warning; this goes beyond clearing cache |
| Wipe data / factory reset | Recovery or a reset setting | Google says a factory reset erases phone data | A separate destructive procedure, outside this tutorial |
On the Samsung route documented in its support article, app-cache clearing uses Settings → Apps → choose the app → Storage → Clear cache. This is not the recovery procedure. Google’s storage guidance also warns that an app can be slower the next time it opens after its cache is cleared.
If an app’s problem is background battery use, use the app-by-app battery restriction guide to investigate that setting separately. Clearing temporary files and changing background permissions answer different questions.
Common mistake: Treating every option containing “wipe” or “clear” as the same operation. Read the target—cache, app data or all phone data—before pressing the confirmation button.
Takeaway: Match the clearing operation to the problem and the data it affects.
Prepare before opening recovery
Keep the manufacturer’s instructions available on another screen, note your exact phone model and software version, and check your backup before switching the phone off. Preparation helps you compare the actual menu with the instructions instead of relying on a remembered button combination.
Use this checklist:
- Record the symptom. Write down the affected task, when the problem began, and whether it followed an update. “The camera app closes when opened” is more useful than “the phone feels bad.”
- Check the backup. Google’s Android backup instructions explain how to review Backup details. They also say some apps cannot back up or restore every setting and item of data; check anything important inside its own app.
- Keep the exact support procedure open. Check the button layout and any connection requirements stated for your model. Do not add or omit a USB connection based on a generic tutorial.
- Separate the changes. Avoid also deleting app data, uninstalling apps and changing power settings during the same attempt. Otherwise you will not know which change affected the symptom.
For a battery problem, copy the one-change observation record before proceeding. Keep the phone’s normal battery behaviour as the comparison, rather than expecting a fixed improvement from cache wiping.
Takeaway: Have the model-specific procedure, a checked backup and a clear symptom record ready.
Step 1 — Open the correct recovery menu
Power the device off first. For an applicable Samsung example, press and hold the listed buttons together until its stated release point; do not use a quick tap. Samsung’s official cache instructions provide different entry combinations for different button layouts. The table below summarizes those published examples; it is not a statement that every phone with similar-looking buttons uses the same entry conditions.
| Layout in Samsung’s published examples | Buttons described | Release point described |
|---|---|---|
| Physical Home button | Volume Up + Home + Power | Release Power at the vibration, then the remaining buttons when the menu appears |
| Separate Bixby and Power buttons | Volume Up + Bixby + Power | Release when the phone vibrates and the logo appears |
| Side button, with no physical Home or separate Power button | Volume Up + Side | Release when the phone vibrates and the logo appears |
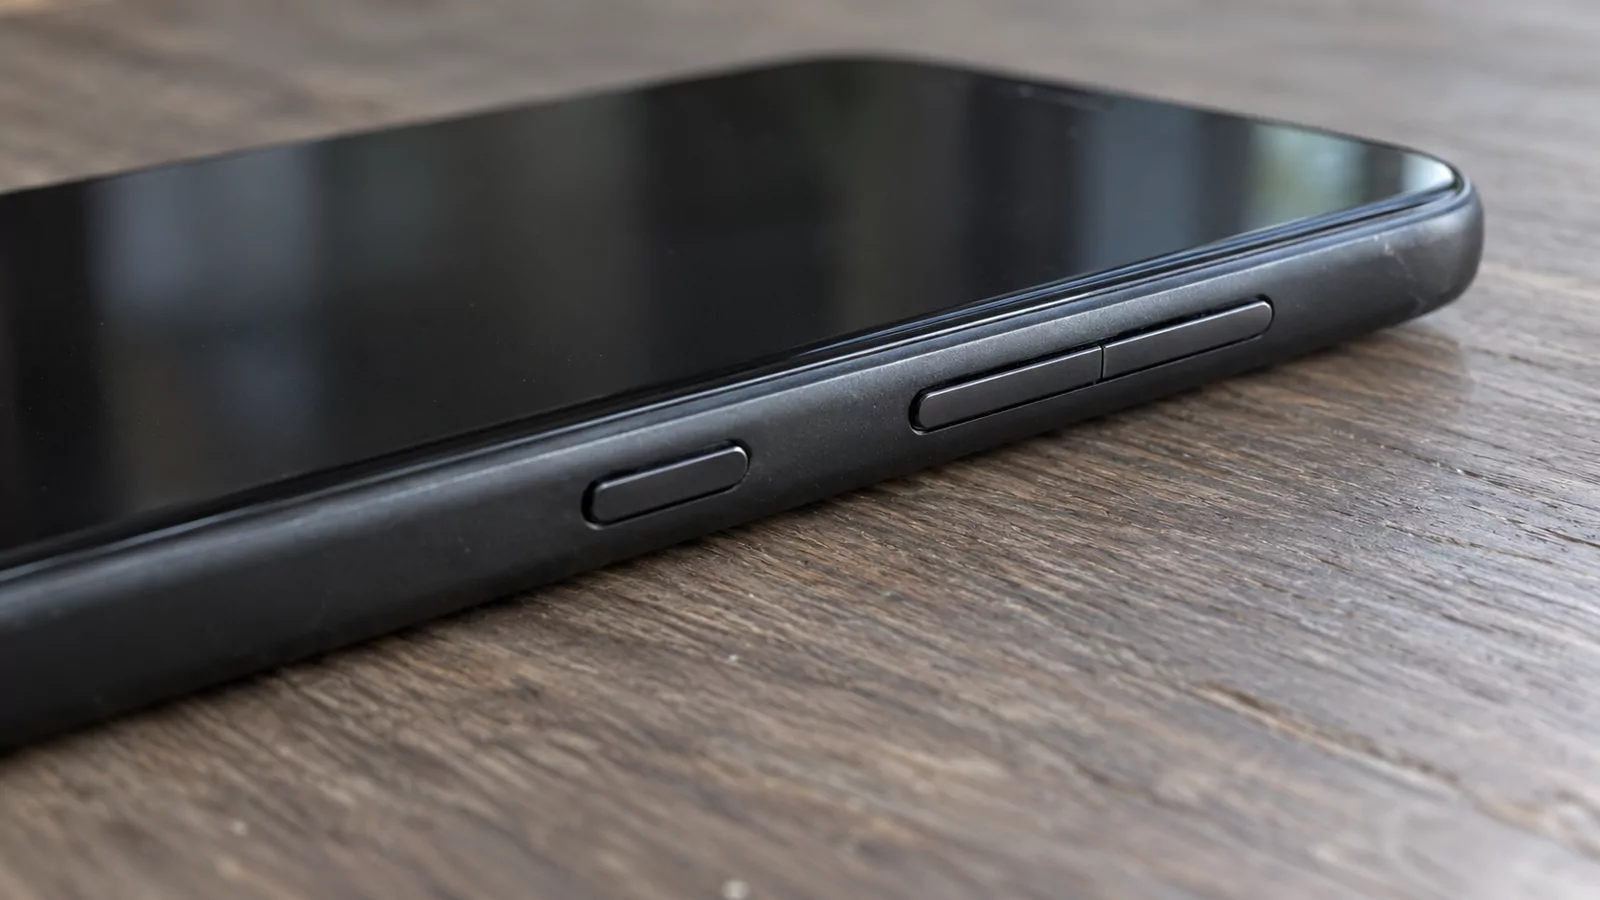
Locate the buttons before starting. If your phone does not match an applicable official example, use its own support instructions rather than choosing the closest row. If it boots normally or opens a different screen, stop and recheck the procedure; this guide does not cover bootloader or flashing menus.
The Product Guides collection provides other Android explanations if recovery is not the right route for the problem you are investigating.
Takeaway: Enter recovery with the procedure for the exact device, not a universal Android shortcut.
Step 2 — Select only Wipe cache partition
Once the documented recovery menu is visible, read the highlighted line before pressing a button. Samsung’s instructions use the volume buttons to navigate and the Power button to confirm. The cache-only line needs to say Wipe cache partition; a line mentioning data or factory reset is outside this procedure.
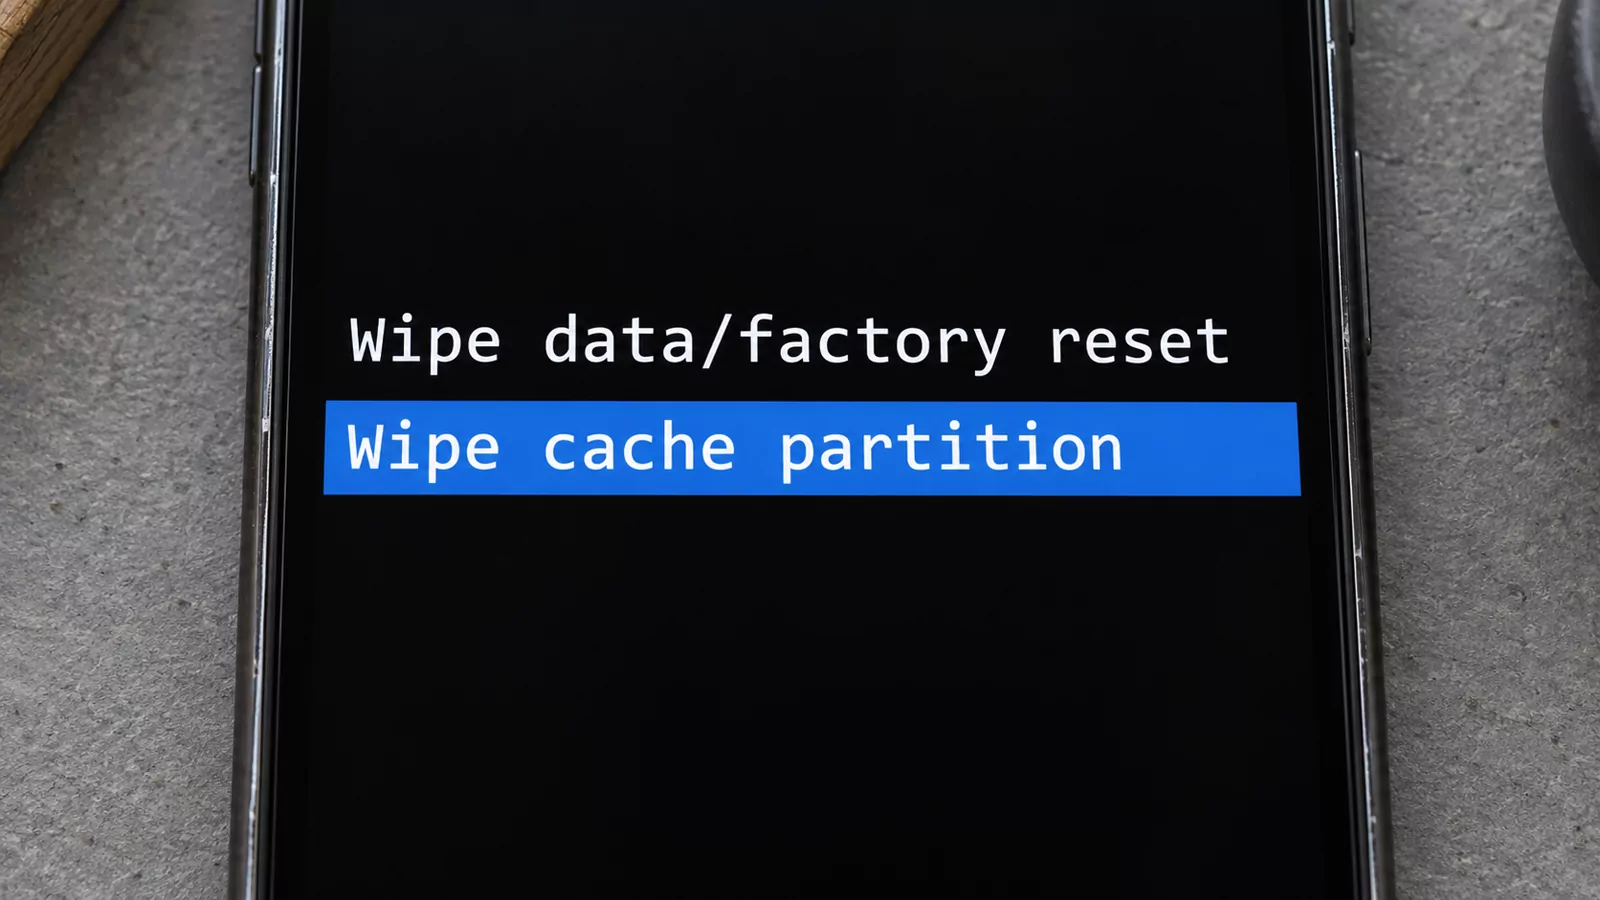
- Use Volume Up / Volume Down to highlight Wipe cache partition.
- Read the selected line again, then use the documented confirmation button—Power in Samsung’s instructions.
- At the next prompt, confirm that it refers to the cache-only operation. Samsung’s procedure then says to select Yes with the volume buttons and confirm with Power.
- Let the operation finish and return to the recovery menu. If it reports an error or shows an unexpected warning, do not improvise another wipe.
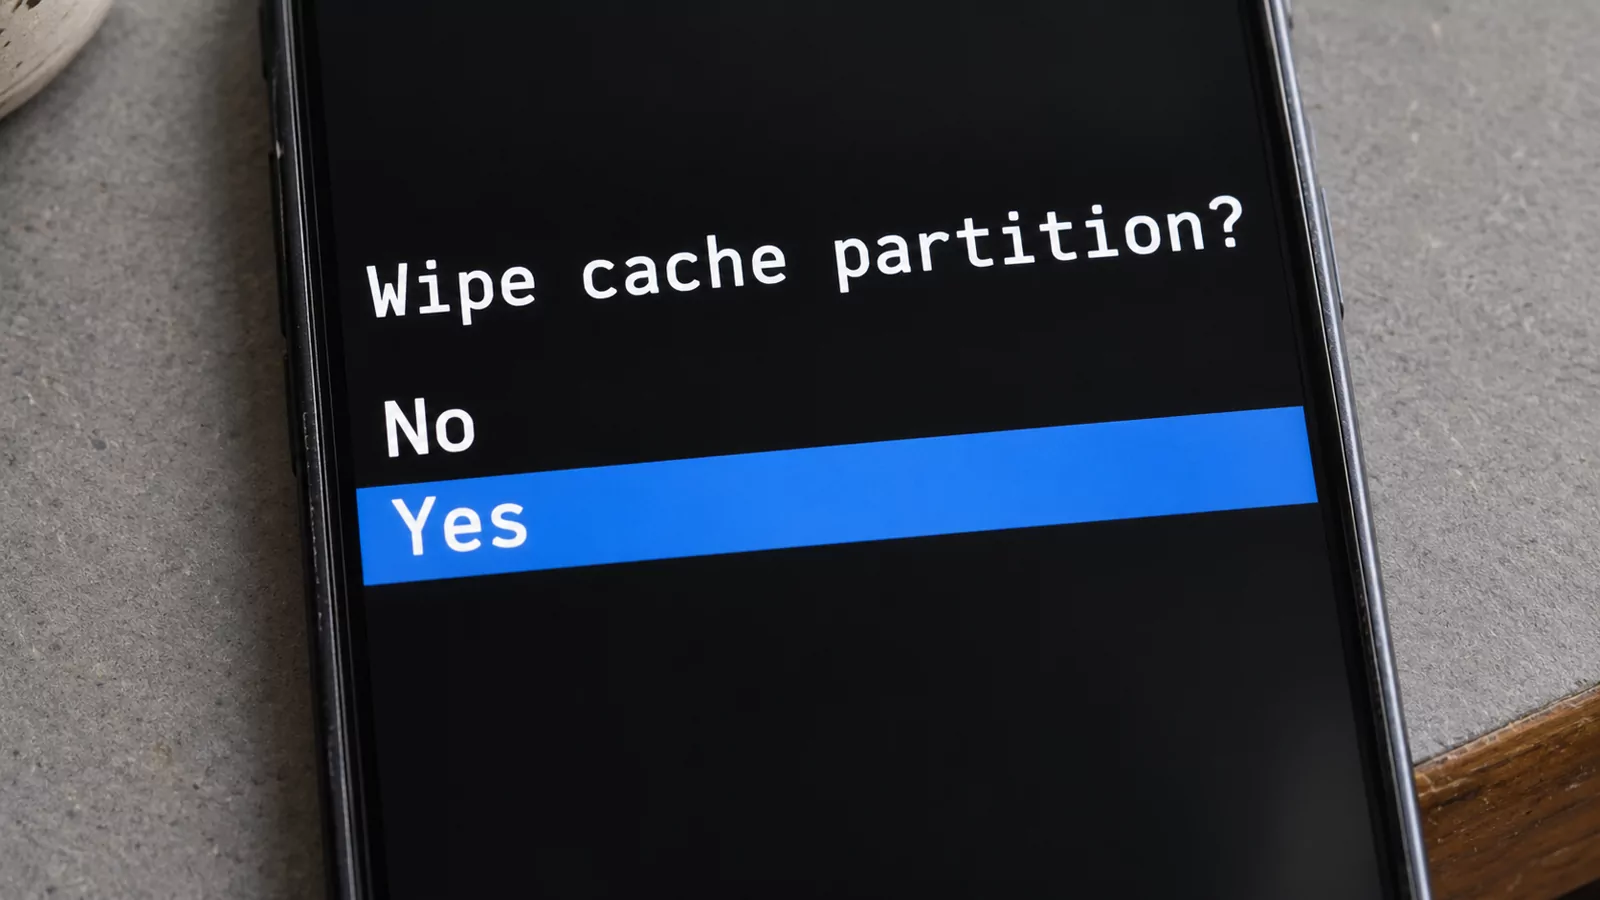
Common mistake: Confirming a familiar-looking Yes prompt without checking which operation it belongs to. The confirmation is meaningful only after you have verified the selected command.
Takeaway: Check the operation at both the menu selection and the confirmation prompt.
Step 3 — Reboot and check the original symptom
Use the recovery menu’s reboot option after the cache operation completes. Samsung’s published procedure calls it Reboot device; check the label in your phone’s own instructions. Once normal Android starts, repeat the task that originally failed before making another change.
Keep a short record:
| Record | What to enter |
|---|---|
| Device and software | Exact model and installed version |
| Original problem | The task or symptom you could reproduce |
| Operation | The exact cache-only menu command used |
| Outcome | Resolved, unchanged or a new symptom |
| Next action | Stop, investigate one app, or contact official support |
A successful completion message tells you the cache operation ran. It does not tell you why the original fault occurred, or establish a speed or battery gain. If nothing changes, avoid repeatedly wiping cache simply because the menu is available.
For drain that persists, return to battery usage and the original baseline. If a required notification now fails after a separate restriction change, follow how to restore an app’s previous battery setting rather than assuming another cache wipe will restore it.
Takeaway: Evaluate the original problem after reboot; stop changing things once you have a clear result.
When this does not apply
A cache-partition wipe is a bounded troubleshooting operation on a supported recovery environment. It is not a maintenance requirement for every Android phone or a remedy for every post-update problem. Use the following limits to choose a different next step.
- No cache-only menu entry: leave recovery through the documented reboot route. Do not unlock the bootloader, install a custom recovery or flash software just to add an option.
- One affected app: investigate that app first. Cache clearing in Settings and recovery cache wiping have different scopes.
- Battery drain alone after an update: Google’s Pixel battery guidance says a Pixel can temporarily use more battery while optimizing new software and advises seeking help if unusual drain continues after a few days. That is Pixel guidance, not a fixed waiting period for every Android device.
- Heat, damaged hardware or power trouble: follow the manufacturer’s instructions for that symptom. A cache wipe cannot establish the condition of the battery or charging hardware.
- Custom recovery or a phone that cannot boot normally: use an appropriate model-specific support route. The sequence here is not a rescue or firmware-repair procedure.
If you are comparing power-management controls with cache operations, the Adaptive Battery explanation describes a different mechanism. It is background context, not an instruction to change more settings during this check.
Takeaway: Choose the diagnostic route for the symptom, and stop when the cache-only procedure is unavailable or inapplicable.
Method and sources
This guide summarizes the official Samsung, Google Android Help, Pixel Help and AOSP documents listed below, reviewed on October 9, 2026. Samsung’s button-layout examples are conditional instructions; they do not verify the recovery menu of every current phone. The observation checklist is an editorial aid, not a manufacturer test protocol.
The photos are AI-generated illustrations of preparation, controls and menu checks. They are not official screenshots or evidence that a particular model supports the operation. Follow the written labels and your exact phone’s official instructions. No performance tests were conducted for this guide.
Related reading
- Android battery and performance diagnosis — Record symptoms and compare one change at a time.
- Background battery restriction steps — Check an app’s power controls and restore them when a needed function breaks.
- Seamless updates in Android Nougat — Understand why update architecture matters when reading old recovery advice.